Your Deployment resources are the computational resources Astro uses to run Airflow in the cloud. Update Deployment resource settings to optimize performance and reduce the cost of running Airflow in the cloud.Documentation Index
Fetch the complete documentation index at: https://astronomer-preview.mintlify.app/llms.txt
Use this file to discover all available pages before exploring further.
Update Airflow configurations
To update a Deployment’s Airflow configurations, you set the configurations as environment variables on Astro. See Set Airflow configurations using environment variables.Update environment objects
You can add, update, and delete Airflow connections that were added through the Astro UI from your Deployment page. To edit a Deployment’s linked connections, click the Environment tab, and then select the connection you want to Edit. See Create connections with the Astro UI for more options.Deployment executor
Astro supports three executors: the Astro, Celery, and Kubernetes executors. Only Celery and Kubernetes executors are available in the Apache Airflow open source project.- Celery executor
- Kubernetes executor (Requires Astro Runtime version 8.1.0 or later)
- Astro executor (Only available for Airflow 3.x Deployments)
Update the Deployment executor
- In the Astro UI, select a Workspace, click Deployments, and then select a Deployment.
-
Click the Details tab and then click Edit in the Execution section.
- In the Execution section, select Astro, Celery or Kubernetes in the Executor list. If you’re moving from the Astro or Celery to the Kubernetes executor, all existing worker queues are deleted. Running tasks stop gracefully and all new tasks start with the selected executor.
- Click Update Deployment.
Configure Kubernetes Pod resources
The Kubernetes executor and KubernetesPodOperator both use Kubernetes Pods to execute tasks. While you still need to configure Pods in your dag code to define individual task environments, you can set some safeguards on Astro so that tasks in your Deployment don’t request more CPU or memory than expected. Set safeguards by configuring default Pod limits and requests from the Astro UI. If a task requests more CPU or memory than is currently allowed in your configuration, the task fails. By default, Astro supports a maximum KubernetesExecutor Pod size of 43 vCPU and 86 GiB of memory. If your workloads require more resources, contact Astronomer support to request larger Pod sizes for your Deployment. To customize the resources for individual task Pods beyond the defaults, see Customize a task’s Kubernetes Pod.To manage Kubernetes resources programmatically, you can set default Pod limits and resources with the
astro deployment createandastro deployment updateAstro CLI commands, or by adding the configurations to aDeployment file.- In the Astro UI, select a Workspace, click Deployments, and then select a Deployment.
-
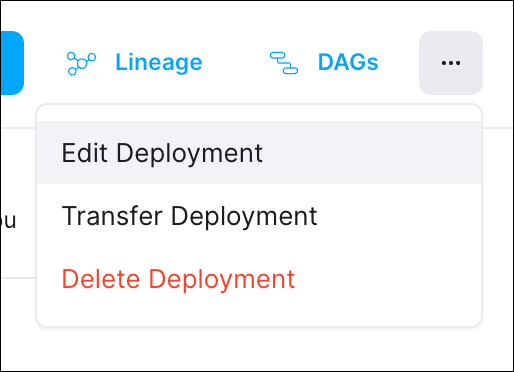
Click the Options menu and select Edit Deployment.
-
In the Execution section, configure the following values:
- CPU Quota: The maximum combined CPU usage across all running Pods on your Deployment.
- Memory Quota: The maximum combined memory usage across all running Pods on your Deployment.
- Default Pod Size:
- CPU: The amount of CPUs that your tasks run with if no CPU usage is specified in their Pod configuration.
- Memory: The amount of memory that your tasks run with if no memory usage is specified in their Pod configuration.
- Storage: Choose the amount of ephemeral storage in GiB assigned to each pod in the Astro UI. This storage volume is transient and allows for the temporary storage and processing of data. The pod is assigned the minimum 0.25 GiB by default. The maximum possible quota is 100 GiB. Only ephemeral storage requests that are greater than the default minimum of 0.25 GiB are chargeable. Note that this feature is in Public Preview.
- Click Update Deployment.
Workers and worker queues
Workers are the Airflow components that execute your tasks. How workers are configured depends on the executor your Deployment uses:- Astro and Celery executors: Workers run in configurable worker queues. Each worker queue defines the worker type (size), concurrency, autoscaling limits, and ephemeral storage for its workers. You can create multiple worker queues to optimize execution environments for different types of tasks. For example, you can assign resource-intensive machine learning tasks to a queue with larger workers, while running lightweight SQL tasks on smaller workers. See Configure worker queues for setup instructions.
-
Kubernetes executor: Each task runs in its own dedicated Kubernetes Pod rather than in a shared worker. You configure Pod resources through default Pod size settings and per-task
pod_overrideconfigurations. See Configure Kubernetes Pod resources and Customize a task’s Kubernetes Pod.
Scheduler
The Airflow scheduler is responsible for monitoring task execution and triggering downstream tasks when the dependencies are met. Scheduler resources must be set for each Deployment and are managed separately from cluster-level infrastructure. To ensure that your tasks have the CPU and memory required to complete successfully on Astro, you can provision the scheduler with varying amounts of CPU and memory.The scheduler always receives a fixed allocation of 1 vCPU and 2 GiB memory in remote execution mode. You cannot change scheduler resources for remote execution Deployments.
You can enable High Availability to run two schedulers in this mode, each with the same fixed resources.
Size options
Astro separates the scheduler and Dag processor for some Deployment sizes, which improves security and reliability because theSchedulerJob and DAGProcessorJob can run on separate Pods. Consider the following details when choosing your scheduler and Dag processor sizes:
- To use the separate scheduler and Dag processor, you must use at least version 9.7.0 of Astro Runtime. If your Deployment uses a lower Runtime version, then the scheduler and Dag processor run on the same Pod, and the Extra Large Deployment size is not available.
- For Small Deployments, the scheduler and Dag processor run on the same Pod.
- Extra Large Deployments have two Dag processors allocated per Deployment.
| Size | vCPU | Memory | Ephemeral Storage |
|---|---|---|---|
| Small (Up to ~50 dags) | 1 | 2GiB | 5 GiB |
| Medium (Up to ~250 dags) | Scheduler: 1 Dag processor: 1 | Scheduler: 2 GiB Dag processor: 2 GiB | Scheduler: 1 GiB Dag processor: 4 GiB |
| Large (Up to ~1000 dags) | Scheduler: 1 Dag processor: 3 | Scheduler: 2 GiB Dag processor: 6 GiB | Scheduler: 1 GiB Dag processor: 4 GiB |
| Extra Large (Up to ~2000 dags) | Scheduler: 1 Dag processor (x2): 3.5 | Scheduler: 4 GiB Dag processor (x2): 6 GiB | Scheduler: 1 GiB Dag processor (x2): 4 GiB |
Update scheduler size
- In the Astro UI, select a Workspace, click Deployments, and then select a Deployment.
-
Click the Options menu of the Deployment you want to update, and select Edit Deployment.
- In the Advanced section, choose a scheduler size. See Scheduler.
- Click Update Deployment. The Airflow components of your Deployment automatically restart to apply the updated resource allocations. This action is equivalent to deploying code and triggers a rebuild of your Deployment image. If you’re using the Celery executor, currently running tasks have 24 hours to complete before their running workers are terminated. See What happens during a code deploy.
Triggerer
The Airflow triggerer executes deferred tasks in anasyncio event loop. Running a triggerer is essential for using deferrable operators.
One replica of the Airflow triggerer with 0.5 vCPU and 1.875 GiB is automatically included in your Deployment, and is the same size for all Deployments. The included triggerer can typically support up to 1000 concurrent running triggers with low to medium memory requirements. If your use case requires over 1000 concurrent running triggers and/or medium to heavy memory requirements, Astro supports customizing the count and size of the triggerer. Leverage the triggerer metrics available in Deployment Analytics to right-size the triggerer. Additional requested compute beyond the default specs will be charged at the A5 worker unit rate, similar to KE/KPO chargeback.
The following table lists all available environment variables for customizing the count and size of the triggerer.
| Environment Variable | Default | Max |
|---|---|---|
| ASTRO_TRIGGERER_REPLICAS | 1 | 8 |
| ASTRO_TRIGGERER_RESOURCES_CPU | 500m (0.5 vCPU) | 5000m (5vCPU) |
| ASTRO_TRIGGERER_RESOURCES_MEMORY | 1920Mi (1.875GiB) | 15360Mi (15GiB) |
Enable high availability
By default, the Pods running your Deployment’s Airflow components are distributed across multiple nodes. When you enable high availability, Astro re-configures the Deployment to be more resilient and avoid a single point of failure by running replicas of key infrastructure components across different availability zones. Changes in high availability mode include:
- Running two schedulers so that at least one is always available
- Running two Dag processors in Deployments with a standalone Dag processor
- Running two webservers
- Running the following components on different nodes with preferred zone-level anti-affinity:
- Scheduler
- Dag processor
- PG Bouncer
- Webserver
- In the Astro UI, select a Workspace, click Deployments, and then select a Deployment.
-
Click the Options menu of the Deployment you want to update, and select Edit Deployment.
- In the Basic section, click the toggle to On for High Availability.
- Select Update Deployment to save your changes.
Enable development mode
Enabling Development Mode on a Deployment allows you to safely separate development and production environments on Astro. Deployments in Development Mode can be hibernated to control costs. In addition to marking a Deployment as Development Mode, you can also control development and testing environments by creating ephemeral preview Deployments. To learn more about which approach is right for you, see Manage development Deployments on Astro. Development Mode is a prerequisite to hibernate a Deployment and must be enabled at Deployment creation. It cannot be turned on after a Deployment has been created, but it can be turned off after a Deployment is created. Development Deployments have the following constraints:- The Small Scheduler (1 vCPU, 2 GiB RAM) is the only scheduler size supported.
- Development Deployments cannot have a P1 ticket raised against them.
- Development Deployments will not be treated as “production” by support.
Hibernate a development Deployment
When you create a Deployment on Astro, you pay for the infrastructure resources that are required to run the Deployment for the duration that it’s active. In development environments when you aren’t always running tasks, you can hibernate, or scale down, all Deployment resources on a specified schedule. When you hibernate a Deployment, all Deployment configurations are preserved, but computing resources are scaled to zero.
For example, if you only need to test a dag during working hours, you can set a hibernation schedule for 5:00 PM until 9:00 AM on Monday through Friday. During this time, your Deployment settings are preserved and your cost on Astro for the Deployment is $0. When the hibernation schedule ends, you can resume using the Deployment. Waking up a Deployment from hibernation is faster than creating a new Deployment and preserves all of your configurations.
 Use Deployment hibernation to ensure that:
- You only pay for the resources that you need, when you need them.
- You don’t have to delete a Deployment in order to avoid the cost of the Deployment.
- You don’t have to recreate development environments and re-enter Deployment configurations.
Prerequisites
You can hibernate a Deployment only if you enabled Development Mode when you created the Deployment. Deployments without this setting enabled can’t be hibernated.Create a wake schedule
Before you create or edit a wake schedule for a Deployment, consider the following constraints:- The Deployment must have the Development Mode setting turned on. This setting can be turned on only when you create a Deployment.
- The High Availability feature is not supported. A Deployment with a hibernation schedule cannot be highly available.
- Deployments with hibernation schedules are not required to meet the uptime SLAs of standard production Deployments.
The following instructions show you how to configure wake schedules in the Astro UI. You can also configure wake schedules programmatically via the Astro API.
- In the Astro UI, select a Workspace, click Deployments, then select a Deployment.
- Click Details. In the Advanced section of your Deployment configuration, click Edit.
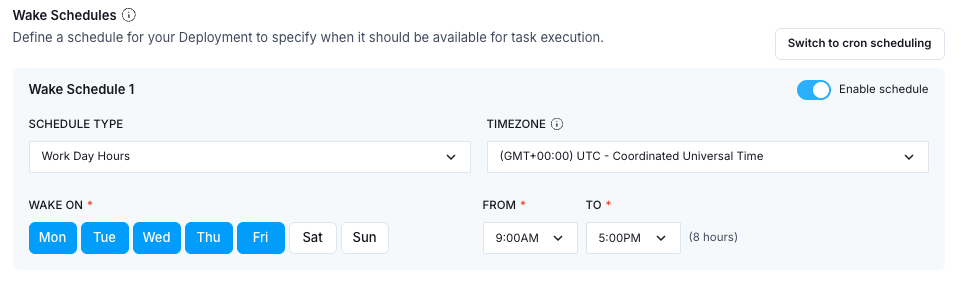
- In the Wake Schedules section, set one or more schedules using either the calendar-based interface or cron expressions. You can switch between the two interfaces by clicking the Switch to cron scheduling or Switch to simple scheduling buttons.
To keep the Deployment hibernated indefinitely, select the Never Wake schedule type in the simple scheduling interface. You can only enable one Never Wake schedule at a time. You can wake up the Deployment by clicking Wake Up Deployment in the Deployment’s More actions menu, or programmatically via the Astro API.
- Click Update Deployment.
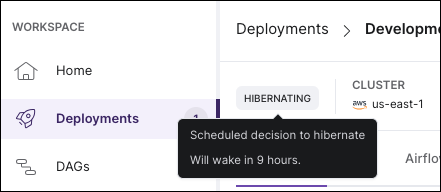
-
Your Deployment shows a Hibernating status in the Astro UI:
- Any task that was previously running will be killed and marked as failed.
- Tasks and dags do not run. Task instances that were already running or scheduled at the time of hibernation will fail and trigger any related notifications.
- No Deployment resources are available. This includes the scheduler, webserver, and all workers.
- You can’t access the Airflow UI for the Deployment.
- You can’t deploy project images or dags to the Deployment.
catchup=True. To avoid incurring additional resource costs, Astronomer recommends disabling catchup on dags in hibernating Deployments.
Manually hibernate a Deployment
Instead of creating a regular hibernation schedule, you can manually hibernate a development Deployment from the Astro UI. This is recommended if you’re not sure when you’ll need to use the Deployment again after hibernating it.- In the Astro UI, select a Workspace, click Deployments, and then select a Deployment.
- Click the More Actions menu of the Deployment you want to update, then select Hibernate Deployment.
- Configure the manual hibernation period, then click Confirm.
- In the Astro UI, select a Workspace, click Deployments, and then select a Deployment.
- Click the More Actions menu of the Deployment you want to update, then select Wake Up Deployment.
-
Select one of the following options for how you want your Deployment to wake up:
- Wake until further notice: Your Deployment wakes up immediately for an indefinite period and ignores any configured hibernation schedules.
- Wake until set time and date: Specify a time that the Deployment should go back into hibernation after waking up.
- Remove override and return to normal schedule: The Deployment returns to following your configured hibernation schedules.
- Click Confirm.